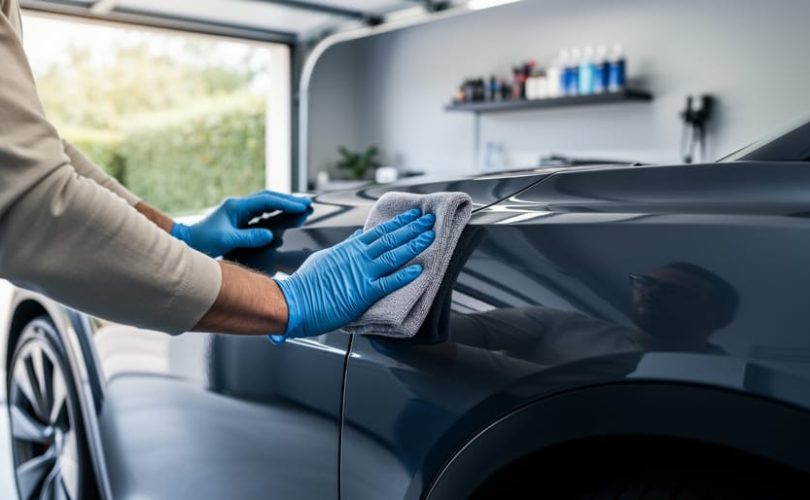
Applying a ceramic coating to your electric vehicle yourself takes 4-6 hours and delivers up to five years of protection that cuts your washing frequency in half. This single-afternoon project creates a hydrophobic barrier that sheds dirt, water, and contaminants on contact, transforming your EV from a weekly wash commitment into a quick rinse every few weeks.
For eco-conscious EV owners who’ve already embraced sustainable transportation, ceramic coating completes the low-maintenance ownership equation. The same forward-thinking DIY approach that drives renewable energy adoption applies here: a modest upfront investment in time and materials yields years of reduced effort and resource consumption. You’ll use significantly less water per year, spend fewer hours detailing, and protect your investment from paint degradation caused by environmental contaminants.
Unlike professional ceramic coating installations that cost $800-$2,000, the DIY route requires $100-$300 in materials and no specialized equipment beyond what most homeowners already own. The process demands careful surface preparation and methodical application, but it’s fundamentally straightforward: clean, decontaminate, polish if needed, then apply the coating in controlled sections.
The payoff extends beyond convenience. Traditional car washing uses 40-60 gallons per session. Ceramic-coated EVs require only a fraction of that water and minimal soap, since contaminants don’t bond to the slick surface. You’re not just saving time, you’re aligning vehicle maintenance with the environmental principles that likely influenced your EV purchase in the first place.
This guide walks you through the complete application process, from garage preparation to final cure, with realistic expectations about what DIY ceramic coatings can achieve and how they genuinely reduce long-term maintenance demands.
Why Ceramic Coating Is Perfect for Low-Maintenance EV Owners
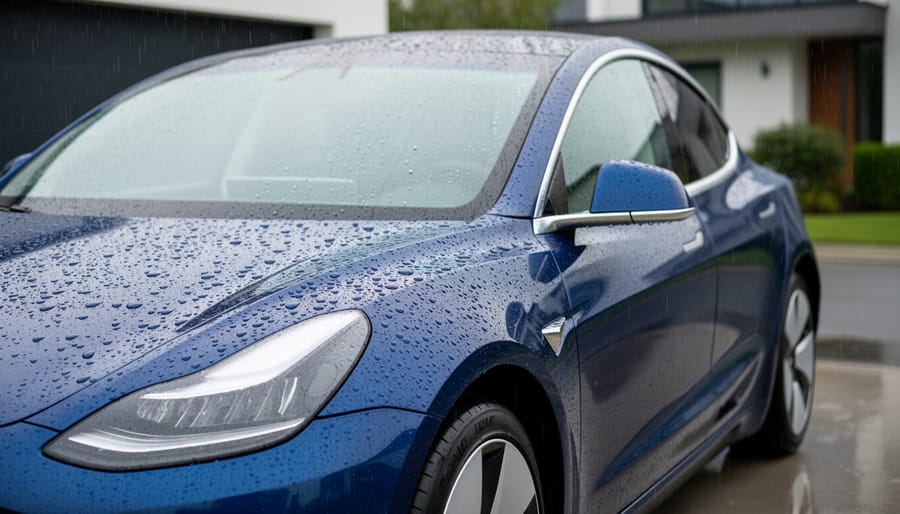
Ceramic coating transforms EV ownership from a weekly chore into a set-it-and-forget-it experience. While traditional car care demands constant attention, a properly applied ceramic coating creates a chemical barrier that actively works to keep your vehicle clean with minimal intervention. For EV owners who’ve already simplified their lives by eliminating gas stations, ceramic coating is the logical next step in reducing vehicle maintenance time.
The science behind ceramic coating explains why it works so well for low-maintenance ownership. These silicon dioxide-based formulas bond at the molecular level with your EV’s paint, creating a hydrophobic surface that water simply rolls off. When rain hits your coated vehicle, it beads into tight droplets that carry dirt and grime away as they slide off the surface. This self-cleaning effect means contaminants never get the chance to bond with your paint. Between charges at home or work, your EV stays cleaner naturally, without you lifting a finger.
The practical benefits for busy EV owners include:
- Extended wash intervals of 2-3 months instead of weekly washing
- Self-cleaning hydrophobic surface that repels water and dirt
- UV protection that prevents paint oxidation and fading over years
- Resistance to environmental contaminants like bird droppings, tree sap, and road salt
- Preserved resale value through maintained paint condition
The UV protection aspect is particularly valuable for EVs. Ceramic coatings resist UV radiation that would otherwise break down your paint’s clear coat, causing oxidation and color fading. This matters more for EVs than traditional vehicles because many owners park outdoors while charging at home, exposing their vehicles to extended sun exposure.
Beyond the time savings, ceramic coating aligns perfectly with the EV ownership mindset. You’ve already chosen a vehicle that requires less maintenance than gas cars, no oil changes, fewer brake replacements thanks to regenerative braking, simpler drivetrains. Ceramic coating extends that philosophy to your vehicle’s appearance. Apply it once correctly, and you get years of protection without dedicating weekends to waxing or frequent detailing sessions.
Tools and Materials You’ll Need
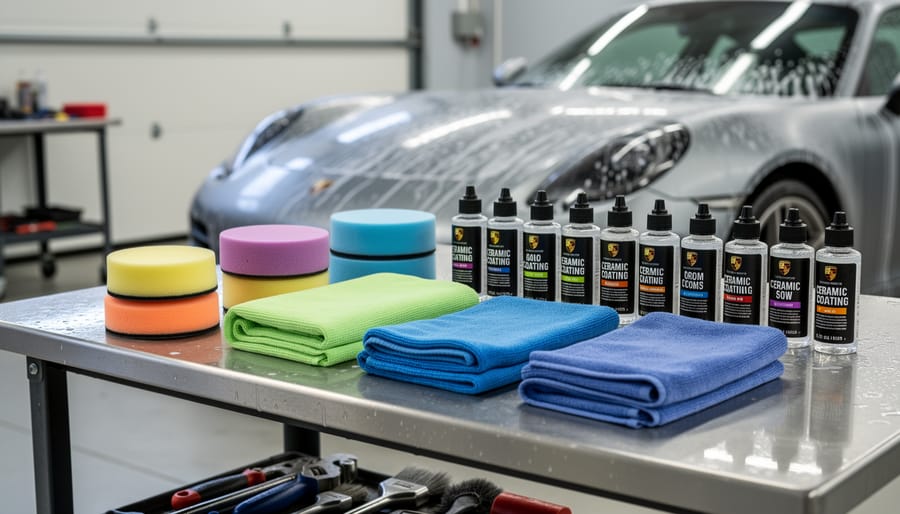
Before you start coating, gather everything in one place so you’re not scrambling mid-application. Most ceramic coating kits range from $50 to $150 depending on formula quality and coverage area, and you’ll spend another $50 to $150 on prep supplies. Budget $100 to $300 total for a complete first-time setup.
The ceramic coating kit itself is your centerpiece purchase. Look for consumer-grade SiO2 ceramic coatings with at least 70% silicon dioxide content, these provide genuine hydrophobic protection that lasts years, not months like spray sealants. Entry-level consumer kits cost $50 to $80 for enough product to coat a midsize SUV twice and are forgiving enough for a first attempt. Mid-range coatings in the $100-$150 bracket offer better durability and gloss: Gyeon’s consumer SiO2 range is the benchmark to measure a kit against at this level, and Car Care Products carries the coatings, applicator blocks and levelling towels together so you are not assembling a kit from three sources. Most kits include applicator blocks and leveling towels, but check before buying separately.
For surface preparation, you’ll need a clay bar kit with lubricant spray ($15-$25), which removes bonded contaminants that washing can’t touch. Isopropyl alcohol is essential for the final panel wipe, buy 70% or 90% concentration and dilute it to 10-15% with distilled water in a spray bottle. Stock up on microfiber towels in three categories: plush drying towels, medium-pile washing towels, and short-pile coating leveling towels. Buy at least a dozen total ($20-$40 for quality options). Cheap microfiber sheds fibers and scratches paint.
You’ll also need automotive masking tape to protect trim and seals, an LED work light or headlamp to spot imperfections under different angles, and nitrile gloves to protect your hands from chemicals. If your paint has noticeable swirls or scratches, add a dual-action polisher with beginner-friendly pads and compound to your list, this jumps your budget by $150-$200 but prevents locking in defects under the coating.
I’ve found that skimping on prep supplies causes more headaches than saving $20 is worth. Quality towels and proper lighting make the difference between frustration and satisfaction.
Safety Precautions and Preparation Requirements
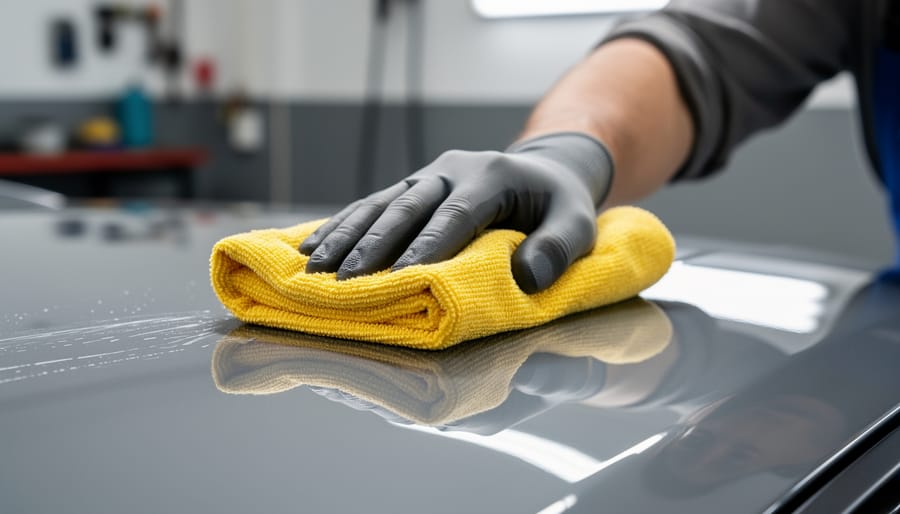
Before you break out your ceramic coating supplies, understanding the safety and environmental requirements isn’t just about getting good results, it’s about protecting yourself and ensuring the coating bonds properly for years of low-maintenance protection.
Personal Safety First
Ceramic coatings contain chemical solvents that release vapors during application. Work in a well-ventilated space like an open garage with fans running or outdoors under a canopy. Never apply coating in a closed garage without airflow, the fumes can cause headaches, dizziness, and respiratory irritation. Wear nitrile gloves throughout the entire process; these chemicals bond to skin just as they do to paint, and they’re difficult to remove. Safety glasses protect your eyes from splashes during panel wipes and coating application.
Environmental Sweet Spot
Temperature and humidity make or break proper curing. The ideal application window is 60-80°F with moderate humidity (40-70%). Too cold and the coating won’t flash correctly; too hot and it cures too quickly, making leveling nearly impossible. A covered workspace prevents dust, pollen, and debris from landing on fresh coating. If you must work outside, choose an overcast day with no wind and no rain in the 48-hour forecast.
Your EV’s paint is designed to protect against harsh conditions but ceramic coating magnifies existing imperfections. Take fifteen minutes to inspect your paint under LED light before starting. Minor swirls are fine, but active rust, deep chips, or clear coat failure means you need paint correction or professional repair first, coating over damage seals it in permanently.
Step-by-Step Ceramic Coating Application Process
Step 1: Thoroughly Wash and Dry Your EV
Start with a proper foundation wash using the two-bucket method: one bucket filled with pH-neutral car shampoo mixed to manufacturer specifications, the other with clean rinse water. This setup prevents you from dragging dirt back onto your EV’s paint during washing. Begin at the roof and work systematically downward, gravity carries contaminants away from already-cleaned areas. Use a dedicated wash mitt (never a sponge or brush), dipping in soapy water, washing a small section, then rinsing the mitt thoroughly in the clean bucket before reloading.
Rinse each panel completely before moving to the next. Leftover soap residue will interfere with coating adhesion later, so take your time here. For the lower panels and wheels, which accumulate more grime, you might need to rinse your mitt more frequently.
Once the entire vehicle is washed and given a final rinse, dry immediately using clean, plush microfiber drying towels. Pat rather than drag the towel across the paint to minimize scratching risk. Water spots are ceramic coating’s enemy, they’ll get locked under the coating if not removed now. Check door jambs, mirrors, and trim gaps where water hides.
Step 2: Decontaminate the Paint Surface
After washing, your paint still harbors invisible contaminants that regular soap can’t touch. Run your fingertips across the surface, that slight grittiness is bonded fallout, tree sap, tar, and industrial debris that will prevent your ceramic coating from adhering properly.
Clay bar treatment removes these embedded particles. Spray a generous amount of clay lubricant (usually included in detailing kits or use diluted car soap) onto a 2×2 foot section. Flatten your clay bar into a palm-sized disc and glide it across the lubricated area using light, overlapping strokes. You’ll feel resistance at first as the clay grabs contaminants. Keep the surface wet, never let the clay touch dry paint.
Work methodically across one panel, then fold the clay to expose a clean surface. Check it frequently; when you see embedded particles, knead the clay to reveal fresh material. The paint should feel glass-smooth when you’re finished.
This step takes 30-45 minutes for a full vehicle but ensures your coating bonds at the molecular level rather than sitting on top of contamination. Skip this, and you’ll likely see premature failure within months.
Step 3: Perform Paint Correction (Optional but Recommended)
Paint correction removes the fine swirls, light scratches, and oxidation that washing alone can’t fix. Skip this step if your EV’s paint looks flawless under bright light, but most vehicles accumulate minor imperfections over time. Ceramic coating amplifies whatever’s underneath, so correcting now means you’ll lock in a glossy finish rather than preserving defects.
A dual-action polisher makes this manageable for beginners. Apply a small amount of light-cutting polish to a foam pad, work one 2×2 foot section at a time using overlapping passes at medium speed. Keep the pad flat against the paint and maintain steady pressure. Wipe away residue with a clean microfiber towel, then inspect under your LED light. You’re not aiming for perfection, just significant improvement. This step typically adds 2-3 hours but transforms the final result from good to exceptional.
Step 4: Panel Wipe with IPA Solution
Panel wiping with an isopropyl alcohol (IPA) solution is your final chance to ensure a perfectly clean surface before coating. Mix a 10-15% IPA solution with distilled water, most ceramic coating kits include a pre-mixed panel prep, but you can create your own using 70% isopropyl alcohol diluted to the proper ratio.
Work one panel at a time to maintain control. Spray the IPA solution onto a clean microfiber towel (never directly on the paint, which wastes product and creates drips). Wipe in straight, overlapping lines from top to bottom. The goal is to strip away any residual oils from your hands, polishing compounds, or environmental contaminants that washing didn’t remove.
Inspect each panel under your LED work light immediately after wiping. The surface should look uniform with no streaks, haze, or oily patches. If you see any inconsistencies, rewipe that section. Don’t rush this step, any contamination left behind will prevent the ceramic coating from bonding properly, compromising durability and creating potential failure points. The paint should feel squeaky clean to a gloved finger.
Once a panel passes inspection, move to the next section. Complete the entire vehicle before starting your coating application.
Step 5: Mask Trim and Sensitive Areas
Before you apply any coating, protect rubber seals, plastic trim, window edges, and emblems with quality masking tape. Ceramic coating bonds permanently to porous surfaces and creates a whitish residue on black trim that’s nearly impossible to remove completely.
Work methodically around door seals, mirror housings, and charging port covers. Pay special attention to textured plastic pieces, these absorb coating quickly. Use your finger to press tape edges firmly against painted surfaces to prevent seepage underneath.
Don’t rush this step. Spending an extra 10 minutes on careful masking prevents hours of frustration trying to buff coating off trim later.
Step 6: Apply Ceramic Coating Panel by Panel
Start with the vehicle’s hood or roof, flat, accessible panels that let you practice the technique before moving to complex areas. Pour 3-4 drops of ceramic coating onto your foam applicator pad. That’s enough for a 2×2 foot section, and it’s better to add more than to overload the pad from the start.
Apply the coating in a crosshatch pattern: make vertical passes first to cover the section, then immediately follow with horizontal passes over the same area. Use light, even pressure, you’re not scrubbing, you’re laying down a microscopic layer. The coating should spread smoothly without dragging or skipping.
Now watch the surface closely. Within 30-60 seconds, the coating will “flash”, it transforms from wet to a glossy, slightly rainbow-like sheen. This is your signal to level. Fold a fresh microfiber towel into quarters and wipe the section with straight, overlapping passes. You’ll feel slight resistance as you remove excess coating and create a uniform layer.
Timing is critical here. If you level too early, you’ll wipe away too much coating. Wait too long, and it becomes difficult to remove, leaving streaks or high spots that look like smudges under light. I’ve found that working methodically, one section fully complete before starting the next, prevents rushing and maintains consistent results.
Move to an adjacent section and repeat. Work panel by panel across the entire vehicle, maintaining the same technique and timing throughout.
Step 7: Remove Masking and Inspect
Remove masking tape within 10-15 minutes of finishing the panel, while the coating remains workable but after initial leveling. Pull tape slowly at a 45-degree angle away from the paint to avoid lifting any coating that may have crept under the edge.
Grab your LED work light and systematically inspect every coated surface. Move the light at different angles across each panel, watching for telltale signs of application issues: rainbow-colored high spots where coating pooled, hazy streaks from uneven leveling, or missed patches with less gloss than surrounding areas. Dark-colored EVs show these flaws most clearly.
If you spot problems now, you can still fix them. Dampen a fresh microfiber towel with IPA solution and gently buff out high spots or streaks using light pressure and circular motions. Work quickly, once the coating fully flashes (typically 60-90 minutes), correction becomes significantly more difficult and may require polishing.
Pay special attention to body lines, door jambs, panel edges, and around badges where coating tends to accumulate. Run your gloved fingertip along these areas feeling for rough spots or ridges.
Step 8: Allow Proper Curing Time
After leveling the coating, your real work shifts to patience. The first 24 hours are critical, park your EV in a controlled environment like a garage, keeping it completely dry and away from dust. Don’t touch the paint, and maintain stable temperatures between 60-80°F if possible.
During this initial cure, the coating’s chemical bonds are forming with your paint. The silica molecules cross-link and harden, transforming from liquid to a durable glass-like layer. Interrupting this process compromises durability, water exposure can create spots or prevent proper bonding, while temperature swings slow curing.
Full cure takes seven days. During this week, avoid washing, keep your EV out of rain, and skip outdoor parking if weather threatens. No quick trips through sprinklers or dewy morning commutes. Think of it as letting concrete set, you wouldn’t drive on fresh pavement.
This patience pays off with coating that lasts years instead of months, delivering the true low-maintenance protection you invested time to achieve.
How to Verify Your Coating Application Success
After completing your coating application and allowing the initial flash cure, you need to verify the coating has bonded properly before the full cure period begins. Start with the water beading test, spray a clean section of the panel with water from a spray bottle or hose. Properly applied ceramic coating produces tight, rounded beads (about the size of a pea or smaller) that roll off the surface with minimal tilt. The water should sheet cleanly rather than spreading out in puddles. If you see large, flat water droplets or areas where water clings to the paint, the coating may not have bonded correctly in those spots.
Next, run your hand gently across the coated surface. It should feel incredibly slick and smooth, almost like touching glass. The coating creates a nearly frictionless surface that contaminants struggle to grip. If you detect rough patches or areas that feel different from the rest of the panel, you may have high spots where excess coating accumulated.
Finally, inspect the entire vehicle under your LED work light, viewing from multiple angles. A successful application shows uniform gloss across all panels with consistent depth and clarity. Watch for streaking, rainbow patterns, or dull patches that indicate uneven coverage or improper leveling. “I was worried I’d messed up my first DIY coating, but when I tested it after 24 hours, the water just danced right off the hood,” shared Mark T., a Model Y owner from Portland. “Eighteen months later, it still beads perfectly, and I’ve only washed it five times. Best weekend project I’ve ever done.”
Maintaining Your Ceramic Coating for Maximum Longevity
The beauty of ceramic coating lies in its dramatic reduction of maintenance demands compared to traditional paint care. While uncoated vehicles typically need washing every week or two to maintain appearance, a properly applied ceramic coating stretches that interval to every 2-3 months, or simply whenever your EV looks visibly dirty. This shift represents a fundamental change in vehicle care philosophy.
Your maintenance routine centers on preserving the coating’s hydrophobic properties rather than constant cleaning. When you do wash, stick with pH-neutral automotive soap specifically formulated for coated surfaces, harsh alkaline or acidic cleaners will gradually degrade the coating’s protective layer. The two-bucket method remains your best approach: one bucket with soapy water, another with clean rinse water to keep your wash mitt contaminant-free. Work top to bottom in straight lines, rinse thoroughly, and dry with clean microfiber towels to prevent water spots.
The maintenance schedule that keeps your coating performing for years looks like this:
- Quarterly gentle wash using pH-neutral soap and the two-bucket method, followed by complete microfiber drying
- Immediate spot cleaning for bird droppings, tree sap, or bug splatter, don’t let these sit for days as acids can etch through coating
- Annual coating booster application to refresh hydrophobic properties and extend longevity beyond the typical 2-3 year mark
- Monthly visual inspections under good lighting to catch any areas where coating may be wearing thin, particularly high-contact zones like door handles
Automatic car washes pose a significant threat to coating longevity. Those spinning brushes and harsh chemical pre-soaks will strip your coating within months rather than years. Skip them entirely, the time you save not washing frequently more than compensates for the occasional hand wash you’ll need.
To set realistic expectations about durability: consumer-grade ceramic coatings typically last 2-3 years with proper care, though some owners report 4-5 years on garage-kept vehicles. You’ll know reapplication is due when water stops beading tightly or contamination becomes harder to remove. That’s still significantly longer than wax or sealant products, which need reapplication every few months.
Common DIY Ceramic Coating Mistakes and How to Avoid Them
The most common DIY ceramic coating mistake, and the one that undermines more applications than any other, is skipping thorough surface preparation. Many first-timers rush through the clay bar treatment or skip the IPA wipe entirely, assuming their vehicle is “clean enough” after washing. This guarantees poor bonding and premature failure, usually within months instead of years. Similarly, applying coating on a hot surface or in direct sunlight causes the product to flash too quickly, making it nearly impossible to level properly and leaving permanent streaks. I’ve watched otherwise meticulous DIY enthusiasts sabotage their work by coating outdoors on a sunny afternoon, then spending hours trying to correct the damage.
Applying too much product is another frequent error that wastes expensive coating and creates difficult-to-remove high spots. A little goes a long way; you want a thin, even layer rather than a heavy application. Just as homeowners who prolong their lifespan through proper maintenance understand that more isn’t always better, coating application requires restraint. Letting the coating sit too long before buffing, typically beyond 90 seconds, makes removal exponentially harder and can leave permanent marks. Set a timer and work methodically in small sections rather than trying to coat entire panels at once.
Finally, rushing the curing period by washing too soon or parking outside in the rain during the first week prevents full chemical bonding. Patience here determines whether your coating lasts months or years. Equally problematic are unrealistic expectations: DIY coatings won’t match professional-grade 9H formulas applied by trained installers, but they absolutely deliver outstanding protection and massive maintenance reduction when applied correctly.
Frequently Asked Questions About DIY Ceramic Coating
How long does DIY ceramic coating really last on an EV?
Consumer-grade ceramic coatings typically last 2-3 years with proper maintenance, while premium DIY formulas can reach 4-5 years. Professional-grade coatings applied by certified installers often last 5-7 years, but the difference comes down to coating chemistry and application precision rather than magic, a well-applied DIY coating delivers excellent protection for most owners’ needs.
Can I apply ceramic coating to glass and wheels?
Yes, ceramic coating works brilliantly on glass (dramatically improves visibility in rain) and wheels (makes brake dust cleanup effortless). Use the same application technique, though some manufacturers offer dedicated formulas for these surfaces with slightly different curing times.
What happens if it rains during the curing period?
Rain during the first 24 hours can ruin your coating by creating water spots that bond permanently or preventing proper curing. If caught in unexpected rain, gently blow-dry the vehicle or carefully blot water with clean microfiber towels, don’t wipe or you’ll disturb the coating.
Do I still need to wax after applying ceramic coating?
No, traditional wax becomes redundant and can actually interfere with the coating’s hydrophobic properties. Skip wax entirely and use a pH-neutral wash soap designed for coated vehicles, your coating provides all the protection and gloss you need.
Two questions come up frequently regarding new EVs and coating removal. For warranty concerns, ceramic coating won’t void your vehicle warranty since it’s a protective layer on top of factory paint, not a modification to the paint itself. That said, check your specific warranty language if your EV has special paint packages or wraps, some manufacturers have specific clauses about aftermarket treatments. Document your coating application with photos and keep product receipts just in case.
Removing ceramic coating requires more effort than applying it. You’ll need paint polish with cutting compound to mechanically abrade the coating layer, working section by section until the hydrophobic effect disappears. It’s labor-intensive but completely doable if you decide to reapply a different product or correct application errors. Professional removal services exist but typically cost $200-400, making DIY removal the practical choice for most owners. The good news is that proper application means you won’t need removal for years, the coating naturally degrades over time rather than failing suddenly.
Applying ceramic coating yourself is one of the smartest decisions you can make as an eco-conscious EV owner. The weekend you invest now translates into years of genuinely low-maintenance protection, no more Saturday mornings scrubbing your vehicle or guilt over letting it sit dirty for weeks.
The numbers speak clearly. You’ll save 3-5 hours every month you would have spent washing and maintaining traditional paint. Over five years, that’s 180-300 hours reclaimed. You’ll also dramatically reduce water consumption, cutting usage by roughly 75% compared to monthly wash routines. Fewer washes mean less chemical runoff entering storm drains and local waterways, a genuine environmental win that aligns with why you chose an EV in the first place.
Cost-wise, a quality DIY kit at $200-300 delivers protection comparable to professional applications costing $800-1,500. You get the same hydrophobic properties, UV resistance, and contaminant repellence without the markup.
This approach fits perfectly with sustainable ownership philosophy. You’ve already invested in renewable transportation technology. Protecting that investment with an efficient, long-lasting solution that minimizes resource consumption just makes sense. The ceramic coating essentially extends the low-maintenance ethos of EV ownership to the exterior care routine.
Take the time to prep correctly, follow the application steps carefully, and let it cure properly. Your reward is a vehicle that looks showroom-fresh with minimal effort for the next several years, exactly what low-maintenance ownership should deliver.